
Smart Media Upload Instructions
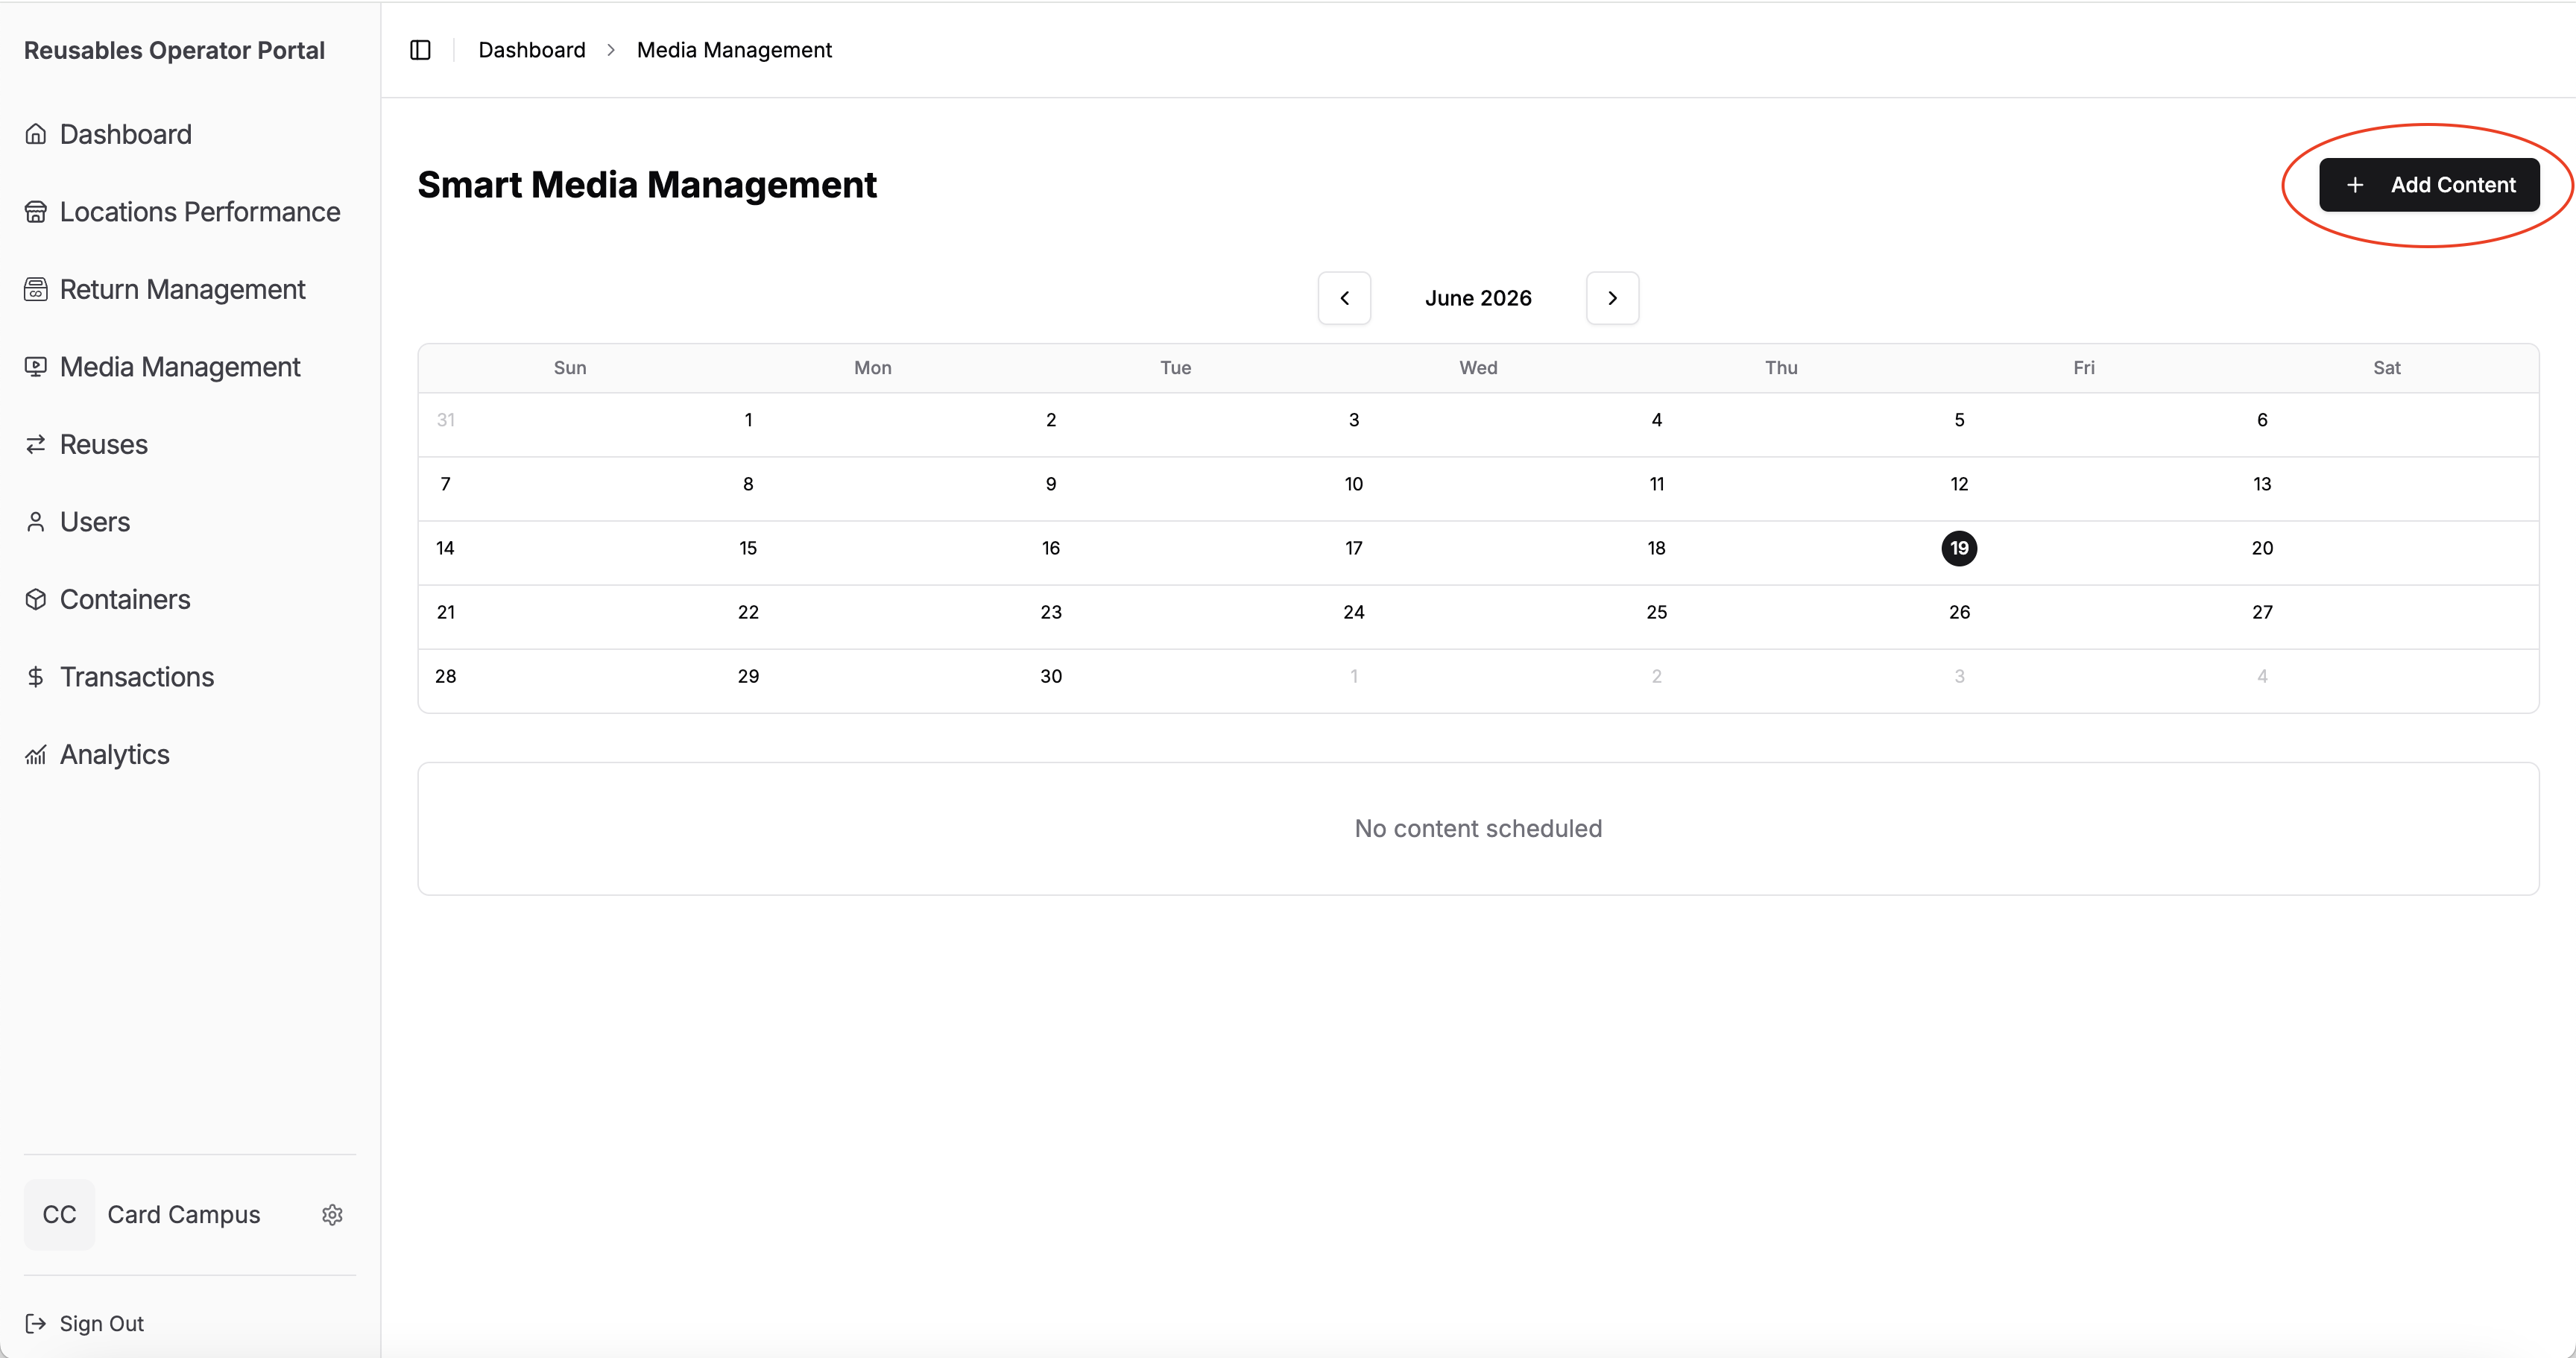
Step 1: Open the Content Uploader
Section titled “Step 1: Open the Content Uploader”Click Add Content button.
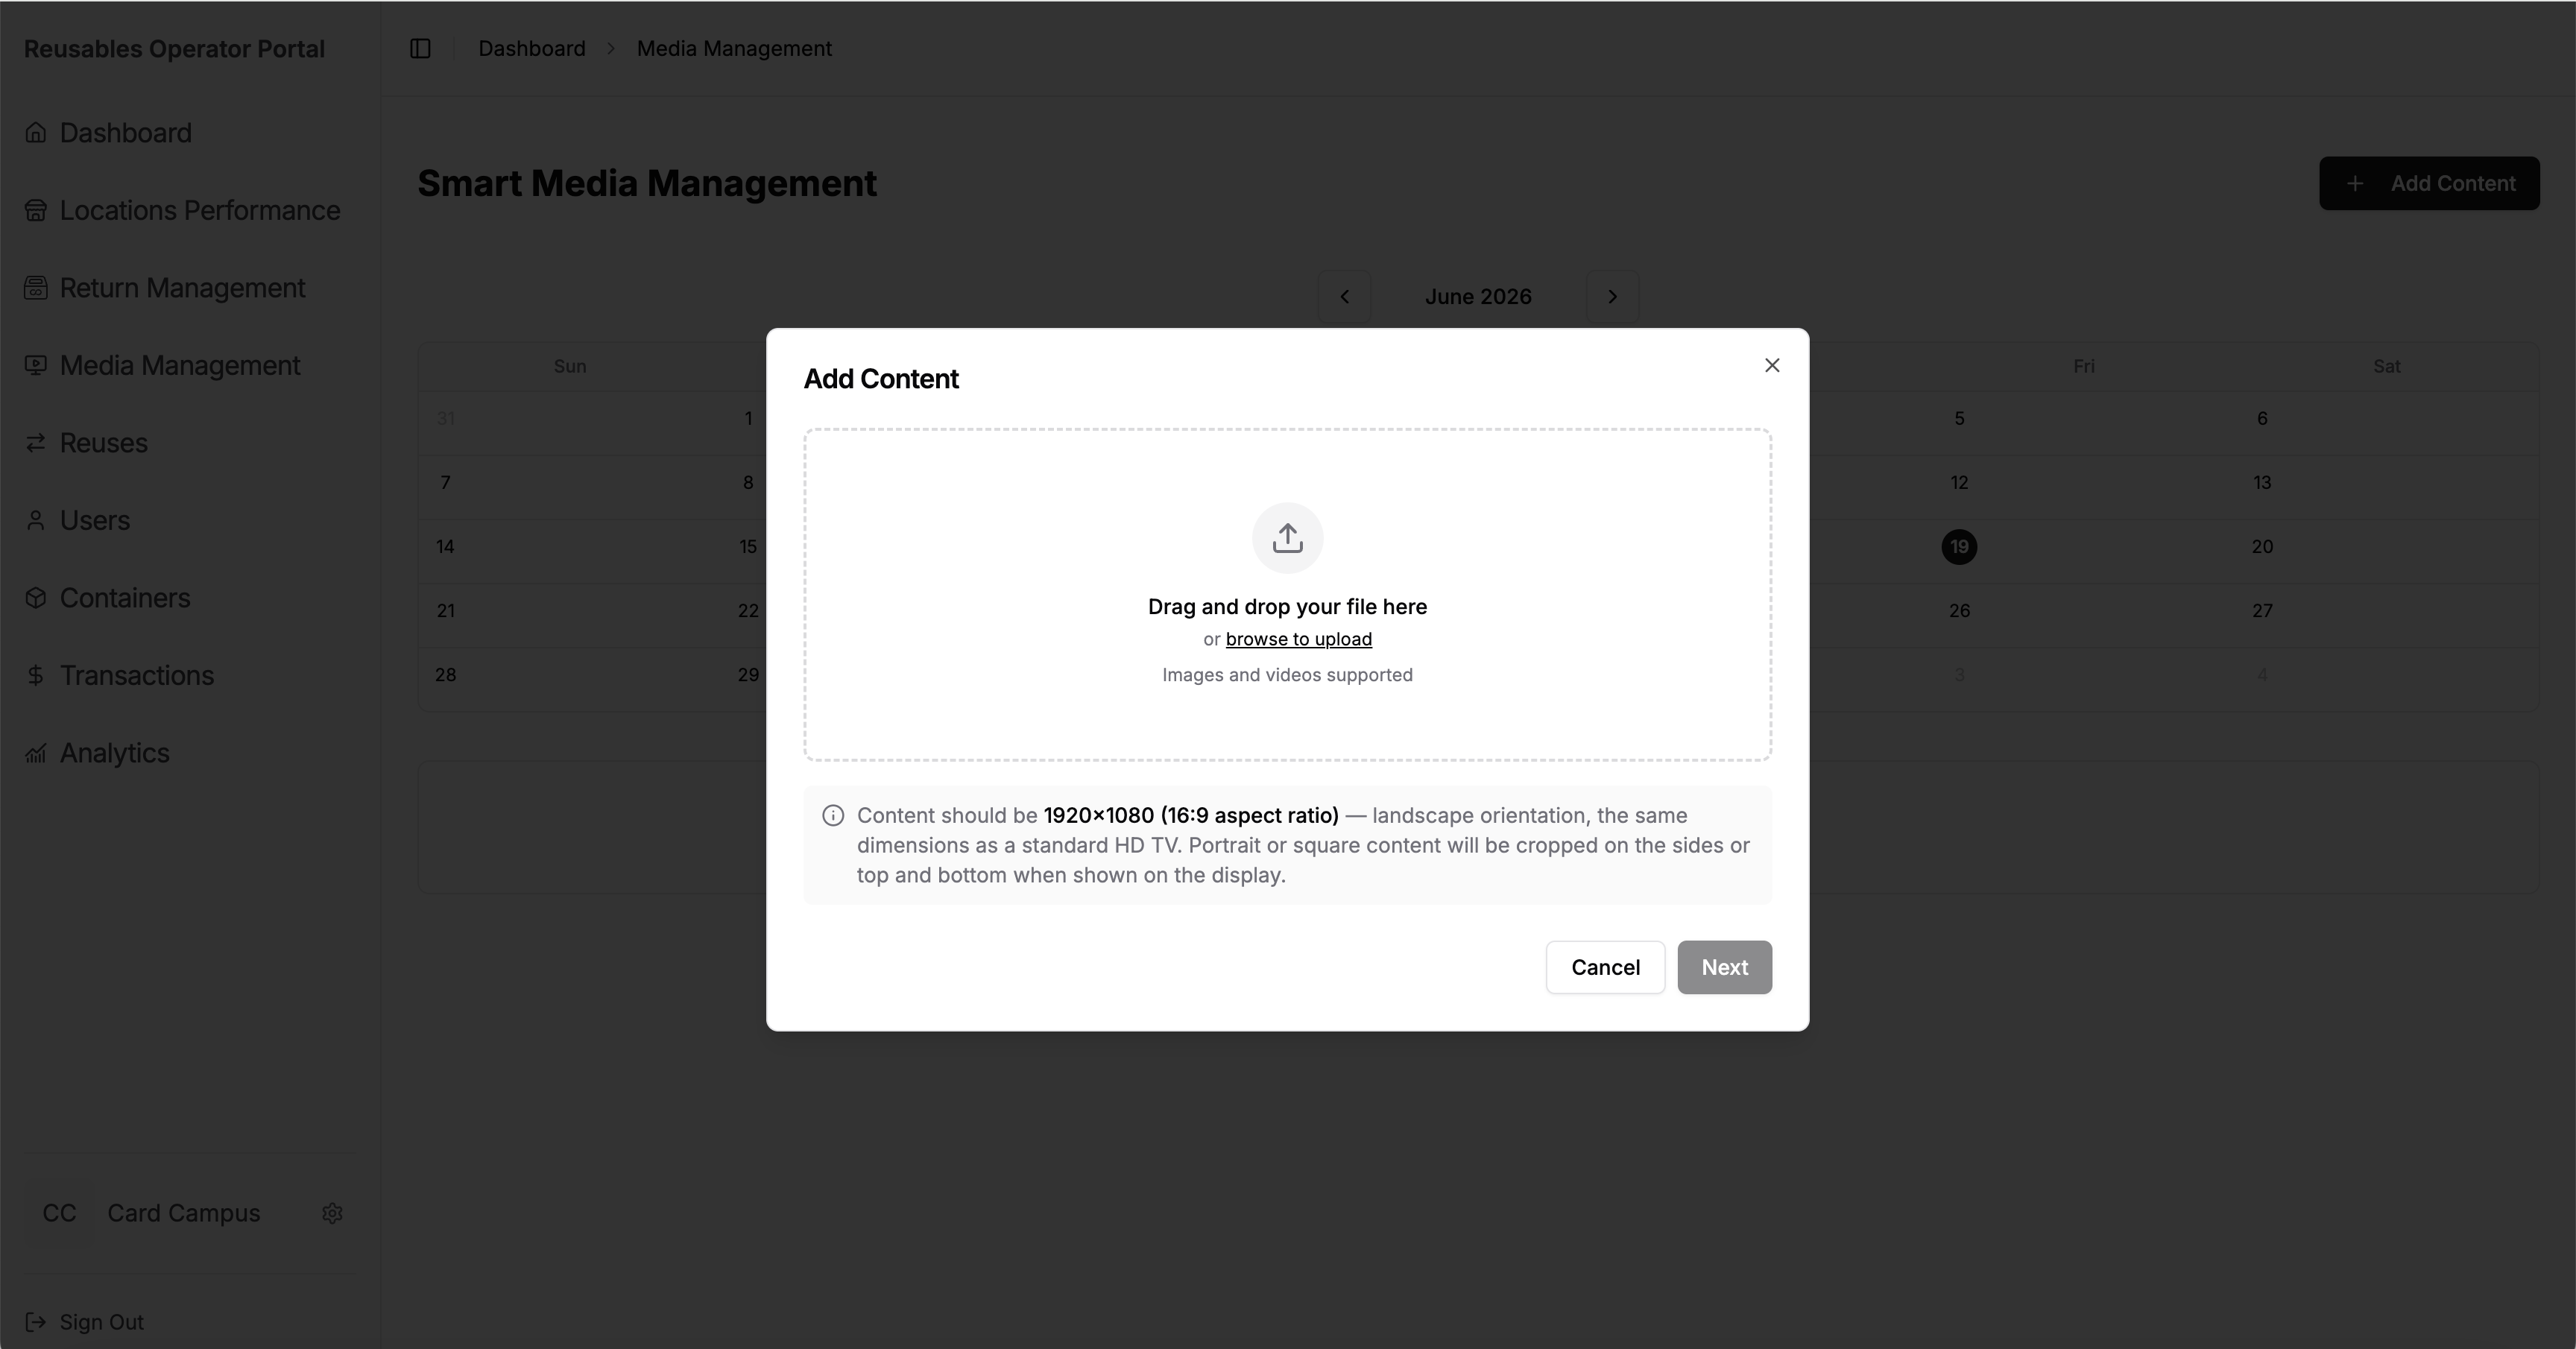
Step 2: Select Your Media File
Section titled “Step 2: Select Your Media File”Select image or video file, then press the Next button
Note: Please select media with the following format:
Resolution: 1920 × 1080
Aspect Ratio: 16:9
Orientation: Landscape
Playback duration:
- Images will display for 30 seconds
- Videos will play for their full duration
Video file size: For best performance, videos should be 100 MB or less
Step 3: Name Your Content & Set a Date Range
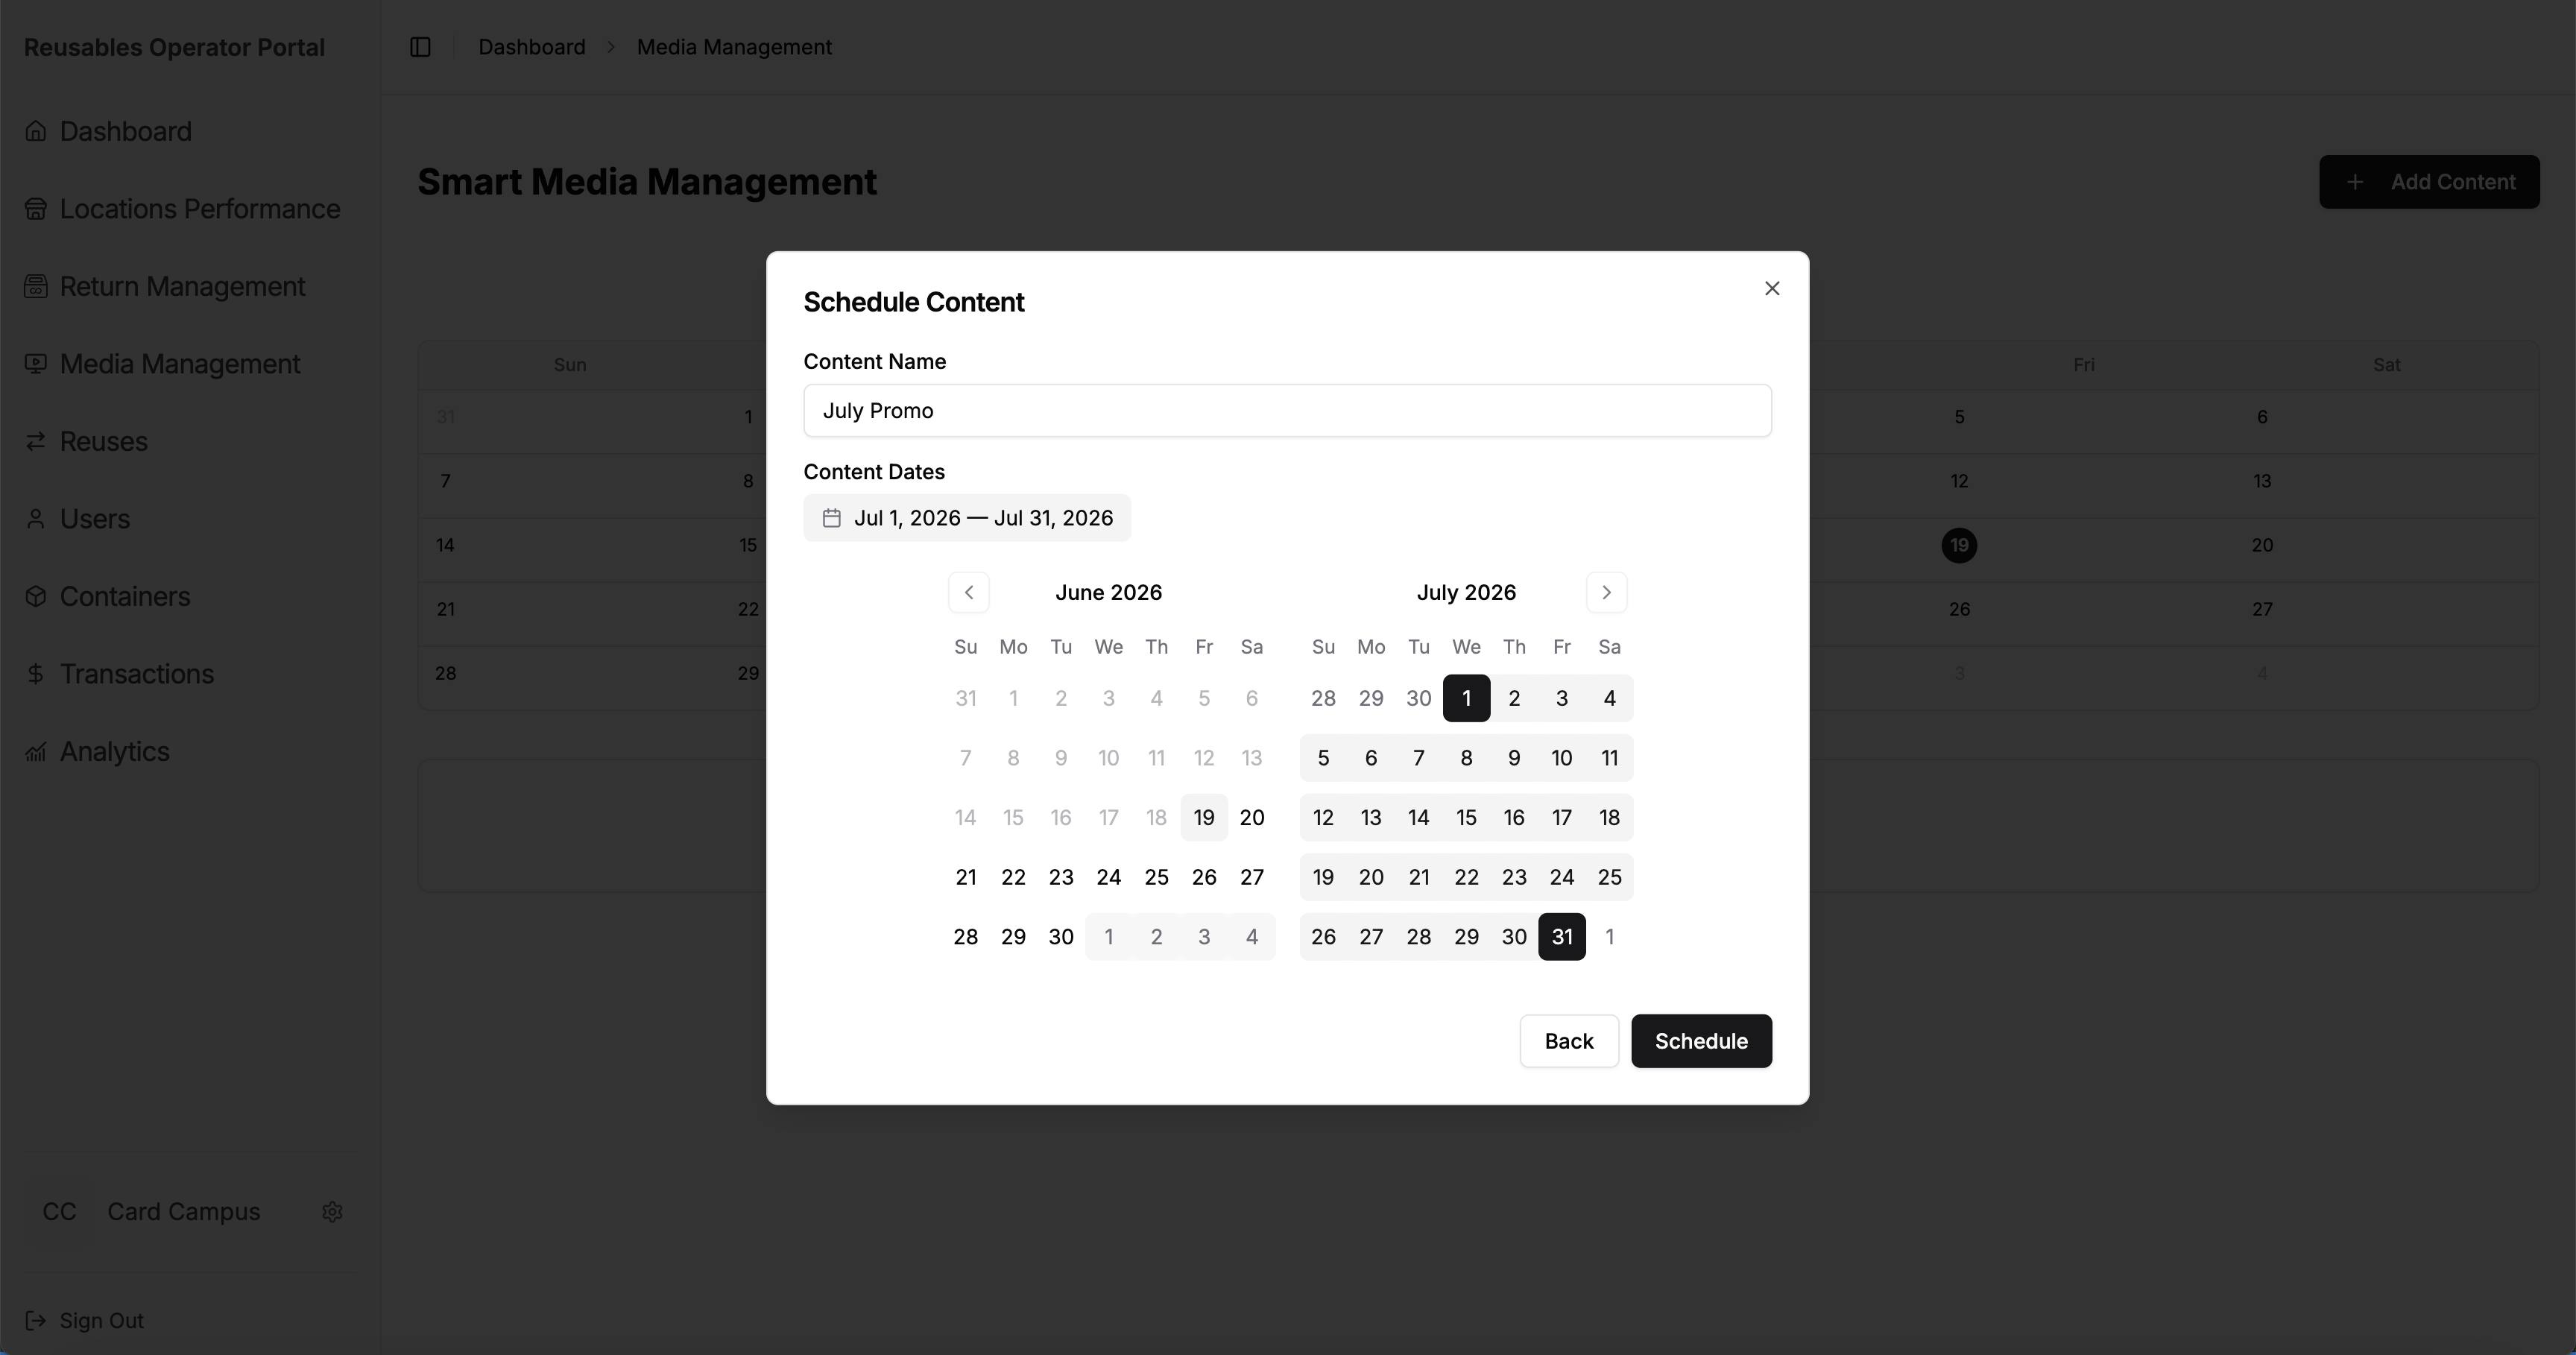
Section titled “Step 3: Name Your Content & Set a Date Range”Enter a Name for your content and select the Start and End Dates for when it should display.
Note: To schedule content for a single day, select the same date for both the start and end date.
Step 4: Schedule & Publish
Section titled “Step 4: Schedule & Publish”Click Schedule to publish the content. It will go live automatically on your chosen start date.
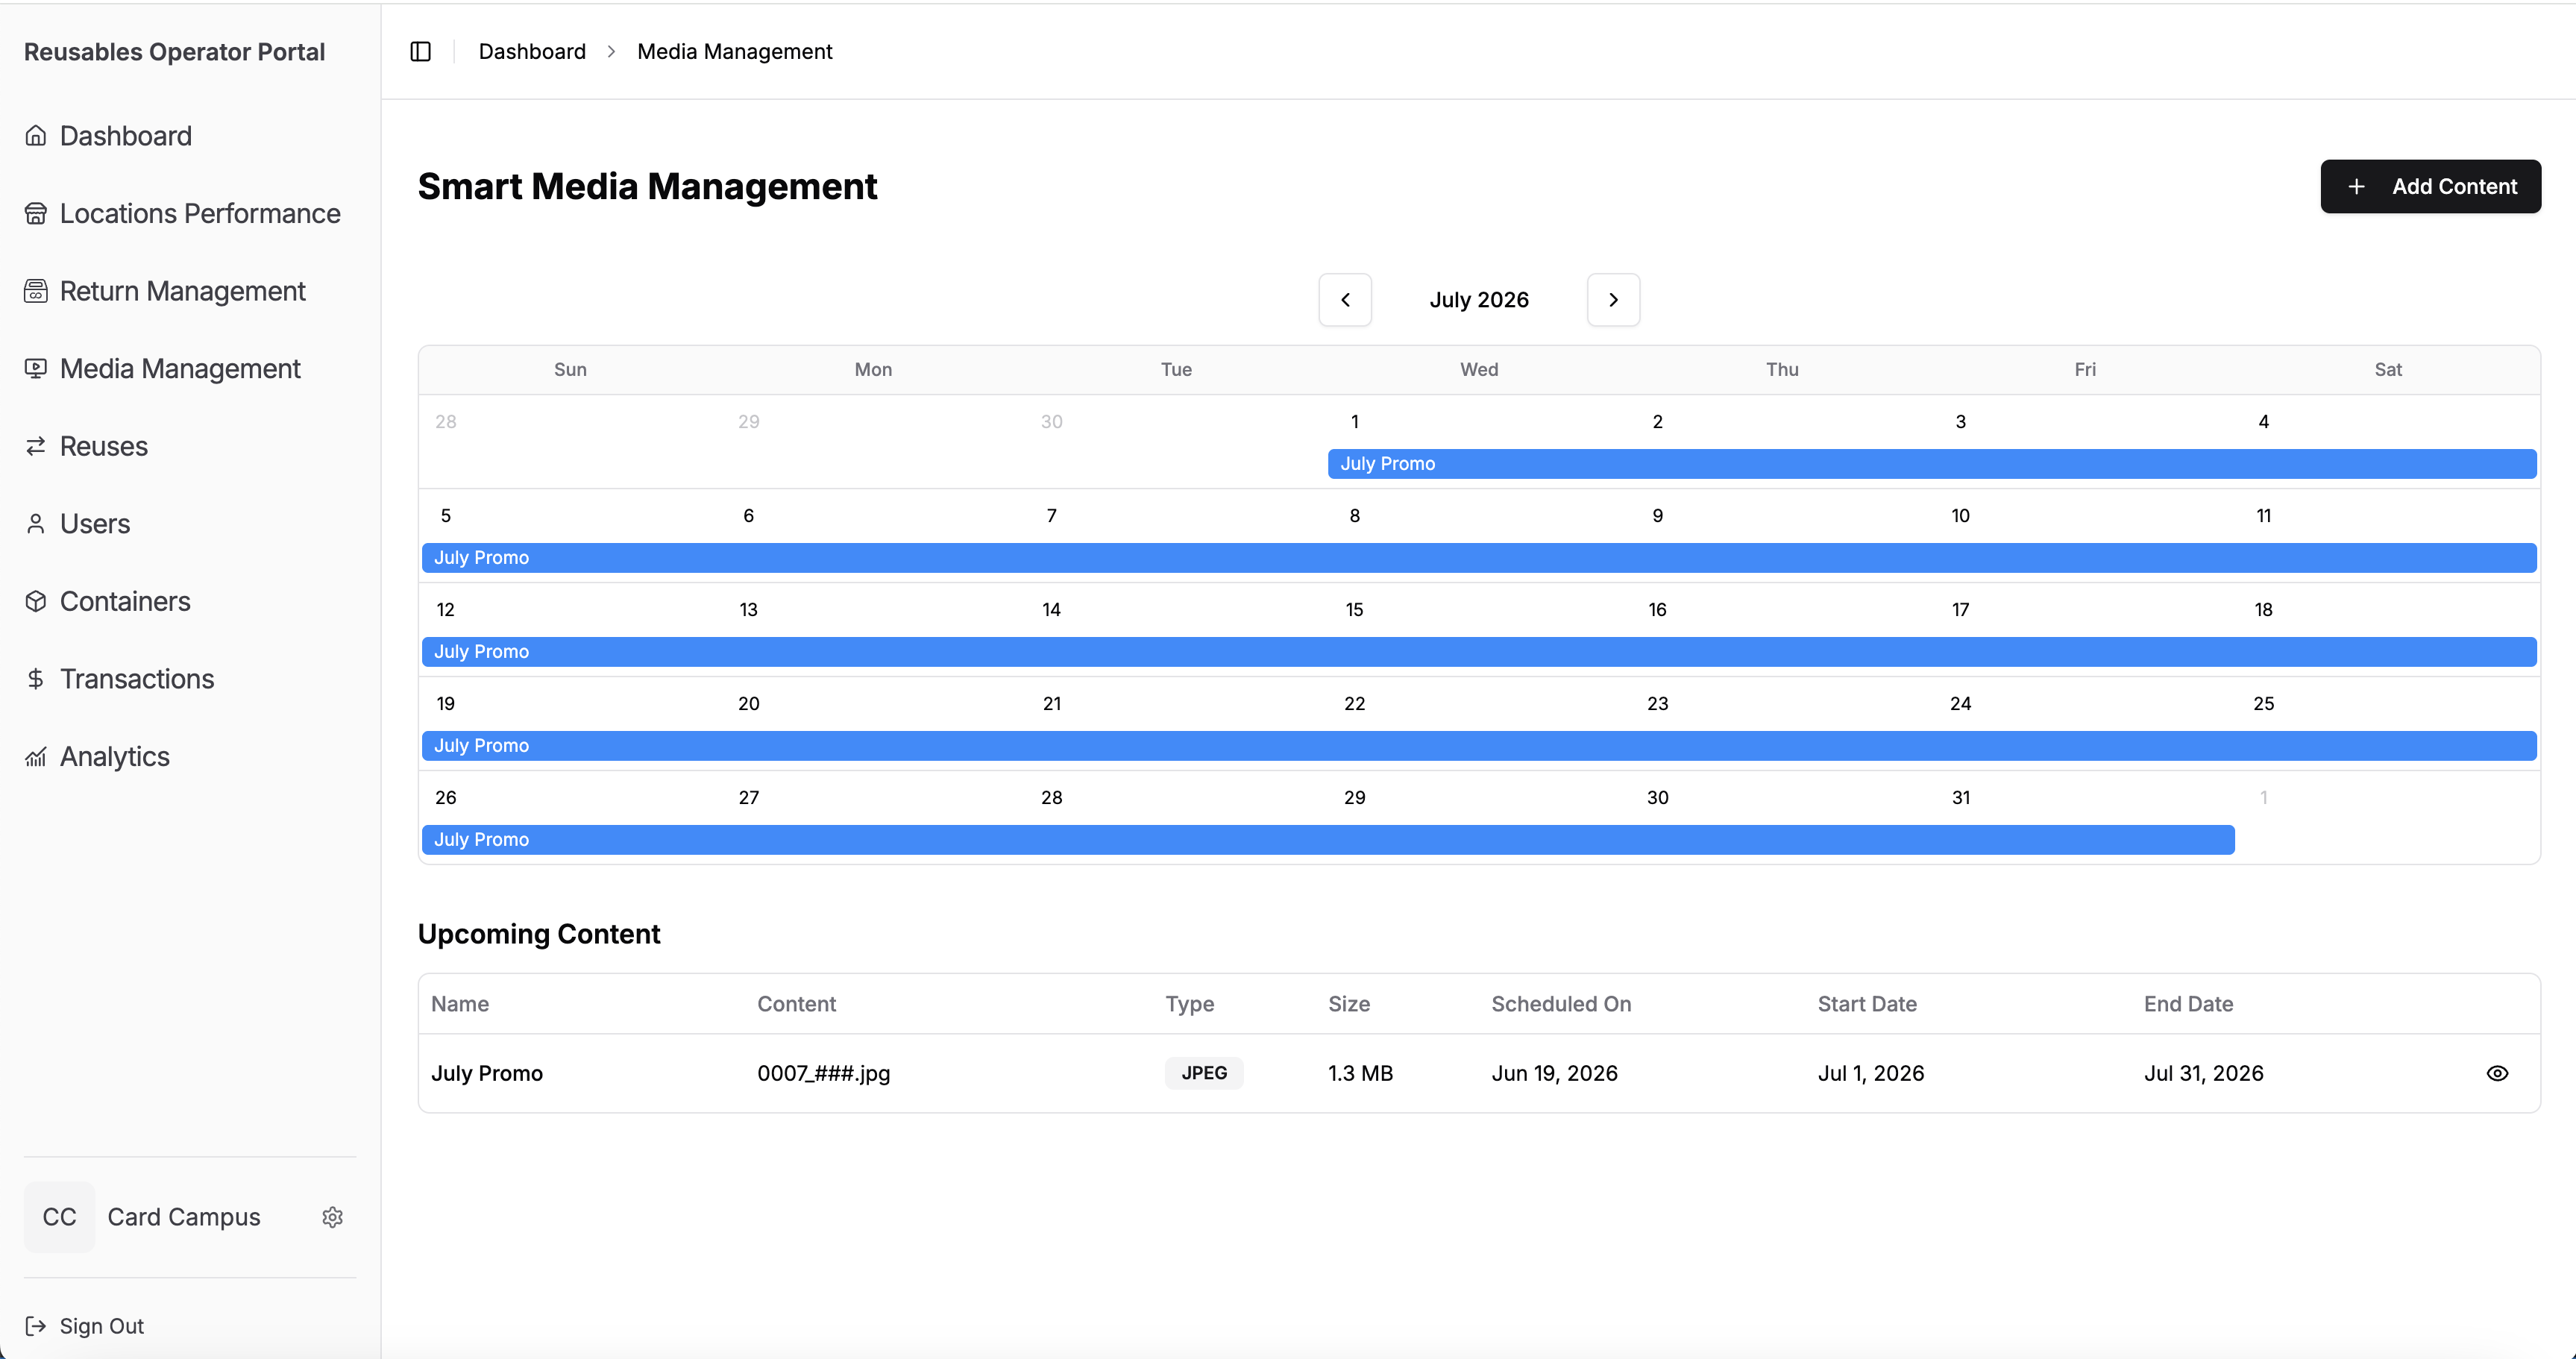
Managing Scheduled Content
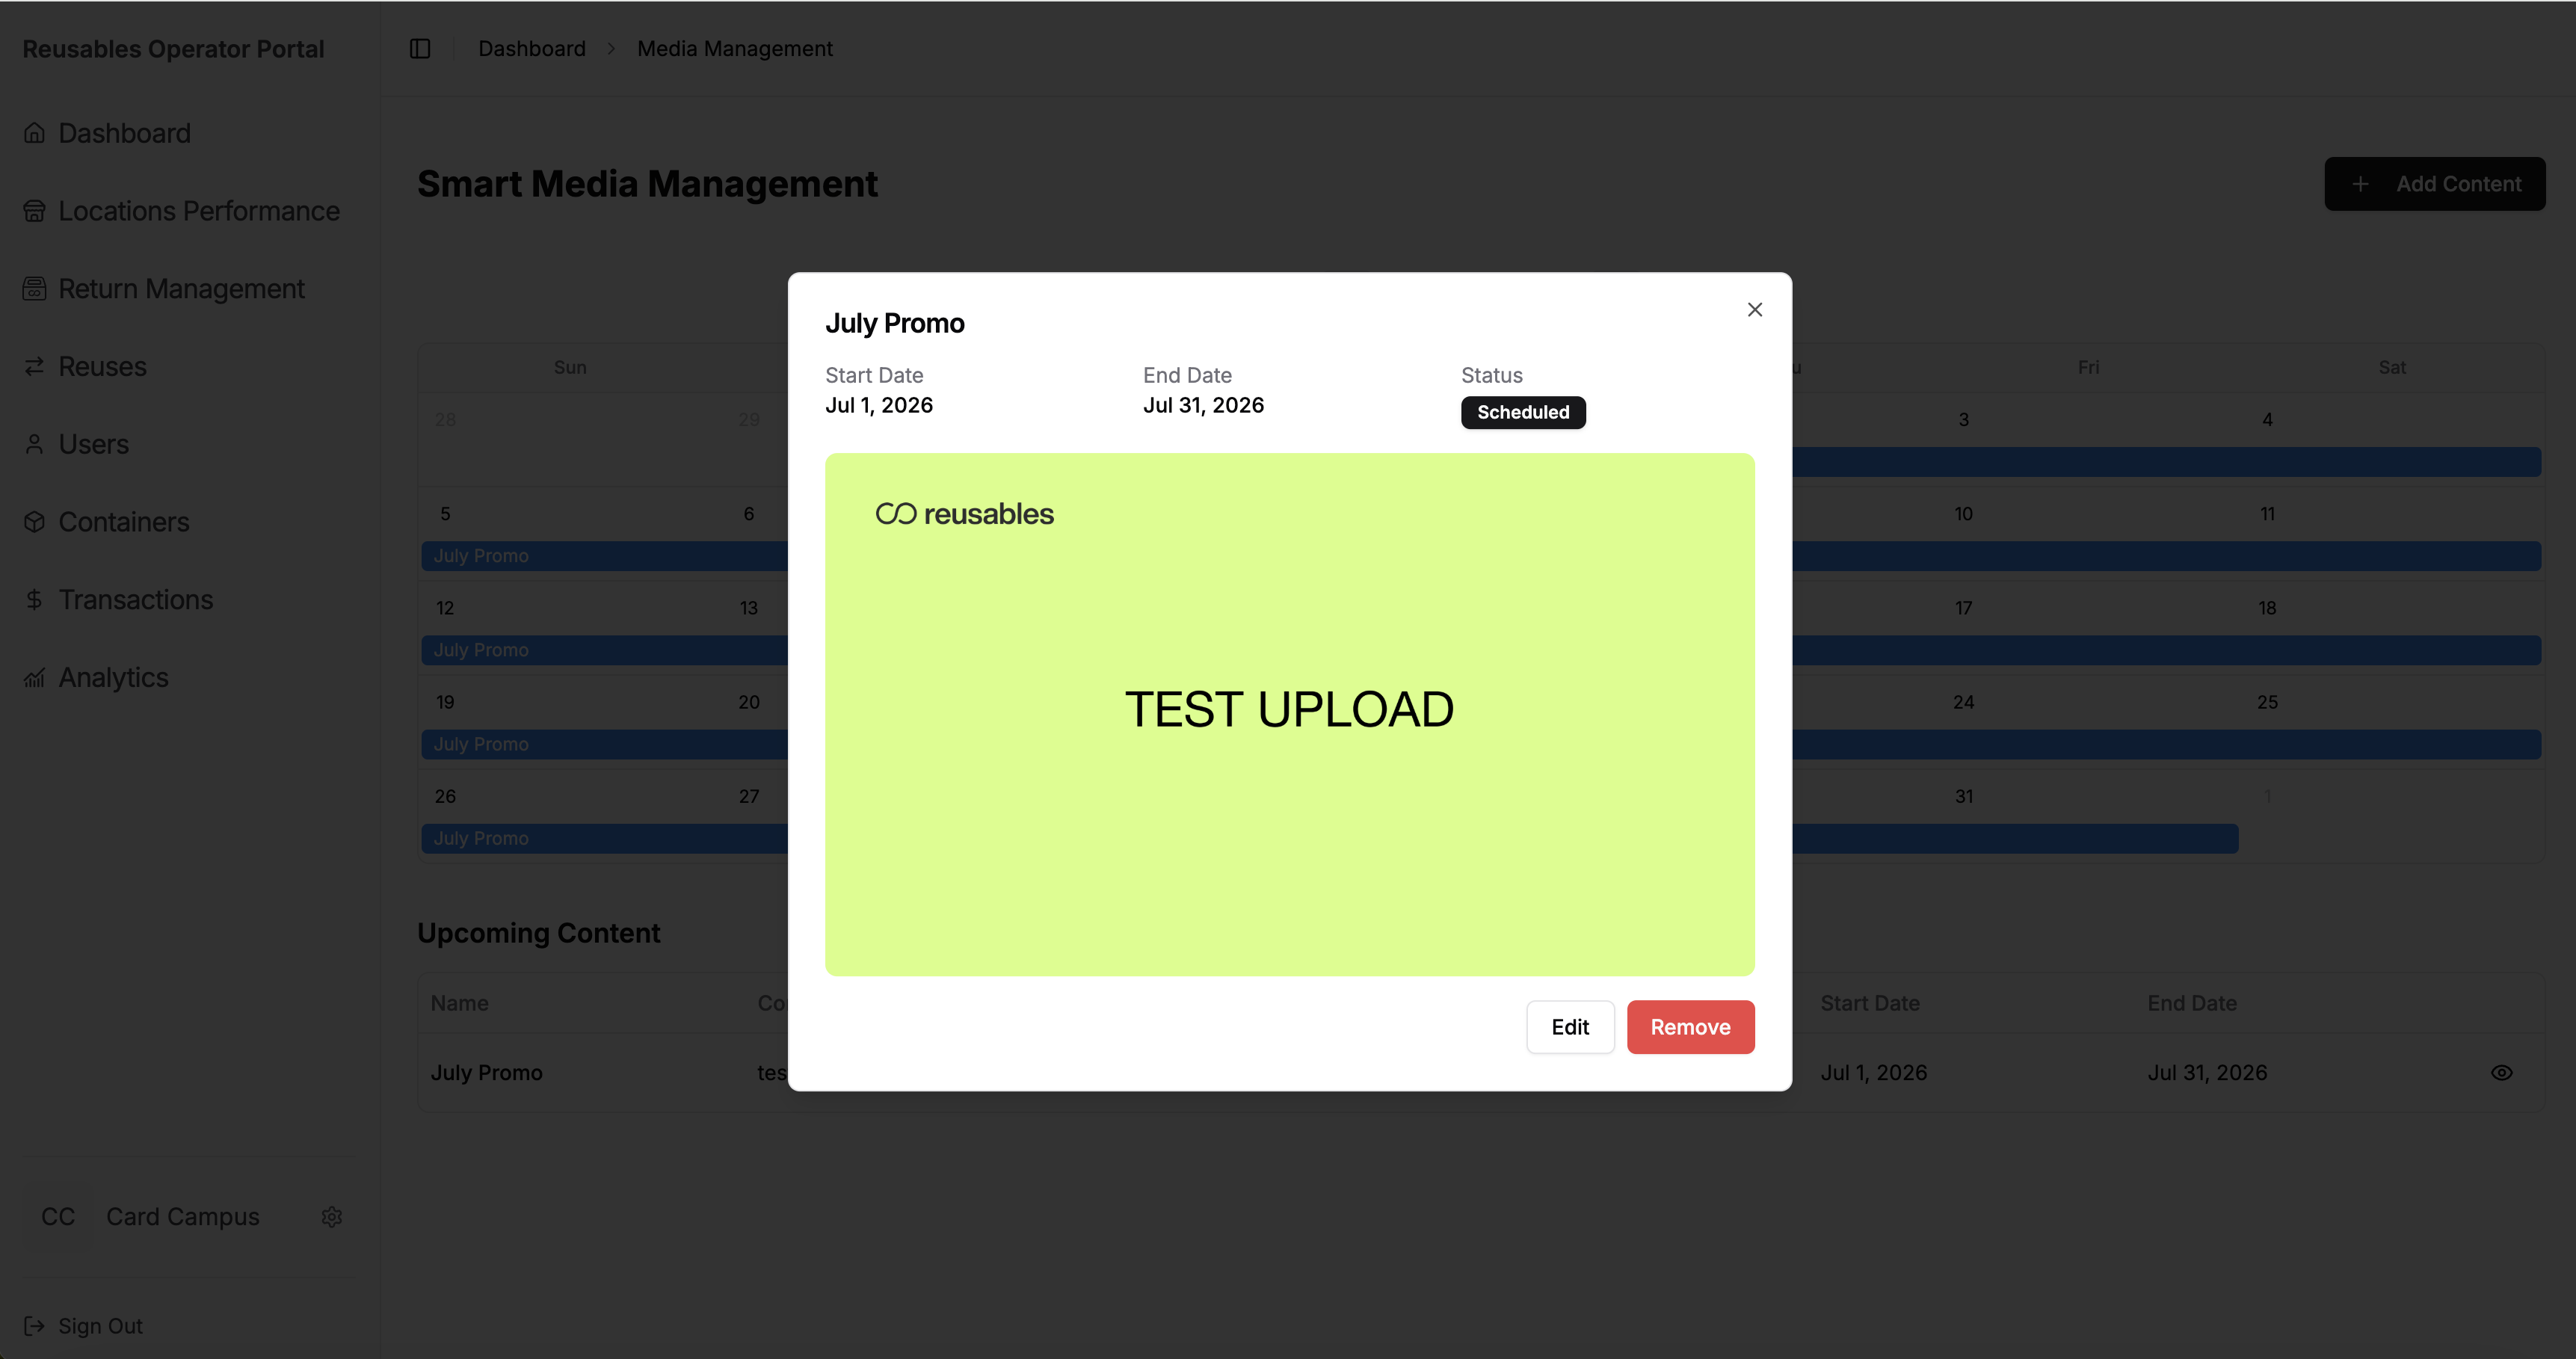
Section titled “Managing Scheduled Content”After content is scheduled, click the calendar bar or the Preview icon in the content table to see how your content will look on screen. From the preview modal, you can:
- Update the content name or adjust the date range.
- Remove/Cancel the scheduled content.