

Mount Smart Media to Smart Return Bin
How to Mount Your Smart Media Screen on a Reusables Bin
Section titled “How to Mount Your Smart Media Screen on a Reusables Bin”Time needed: about 30 minutes People needed: 1-2 Tools needed:
- Robertson 3 (Square Drive 3, SQ3)
- Keys to open the rear hatch of the SRB
What’s in the box
Section titled “What’s in the box”Large box:
- 1 × TV
- 2 × mounting brackets
 Parts bag (sometimes in a small cardboard box):
- 4 × large screws with washers (for attaching the brackets to the TV)
- 1 × L-shaped key (for tightening the large screws)
- 2 × antenna wires
- 2 x barrel keys for opening back hatch of TV
- 1 × wired mouse
- 1 × remote

Separate Small Bag:
- 10 × smaller screws (for attaching the brackets to the bin)
- 2 x security tether cables with mounting plates
- 2 x small bags with wall-mounting screws and anchors

Part 1: Attach the brackets to the TV
Section titled “Part 1: Attach the brackets to the TV”Step 1. Lay the TV face-down on a soft surface.
Put a towel or blanket on a table and gently place the TV screen-side down.
Step 2. Find the 4 holes on the back of the TV.

Step 3. Line up the brackets and screw in the large screws.
Push each screws through the bracket into the TV, and tighten it with the L-shaped key until snug


Part 2: Prepare the bin
Section titled “Part 2: Prepare the bin”Step 4. Find the 10 mounting holes on the bin.
There are 10 holes on the back outer perimeter of the bin body. You’ll start with only the outer top row of 4.
 Step 5. Partly screw in the top 4 small screws.
Screw each one in only part of the way, leaving about ~1cm sticking out. These act as supports for the brackets to rest on before screwing in fully.

Part 3: Hang the TV (Ideally 2 people)
Section titled “Part 3: Hang the TV (Ideally 2 people)”Step 6. Lift the TV and rest the brackets on the top screws.
Hold the TV upright and line the brackets up with the 4 sticking-out screws and lower the TV gently until the brackets rest on them.
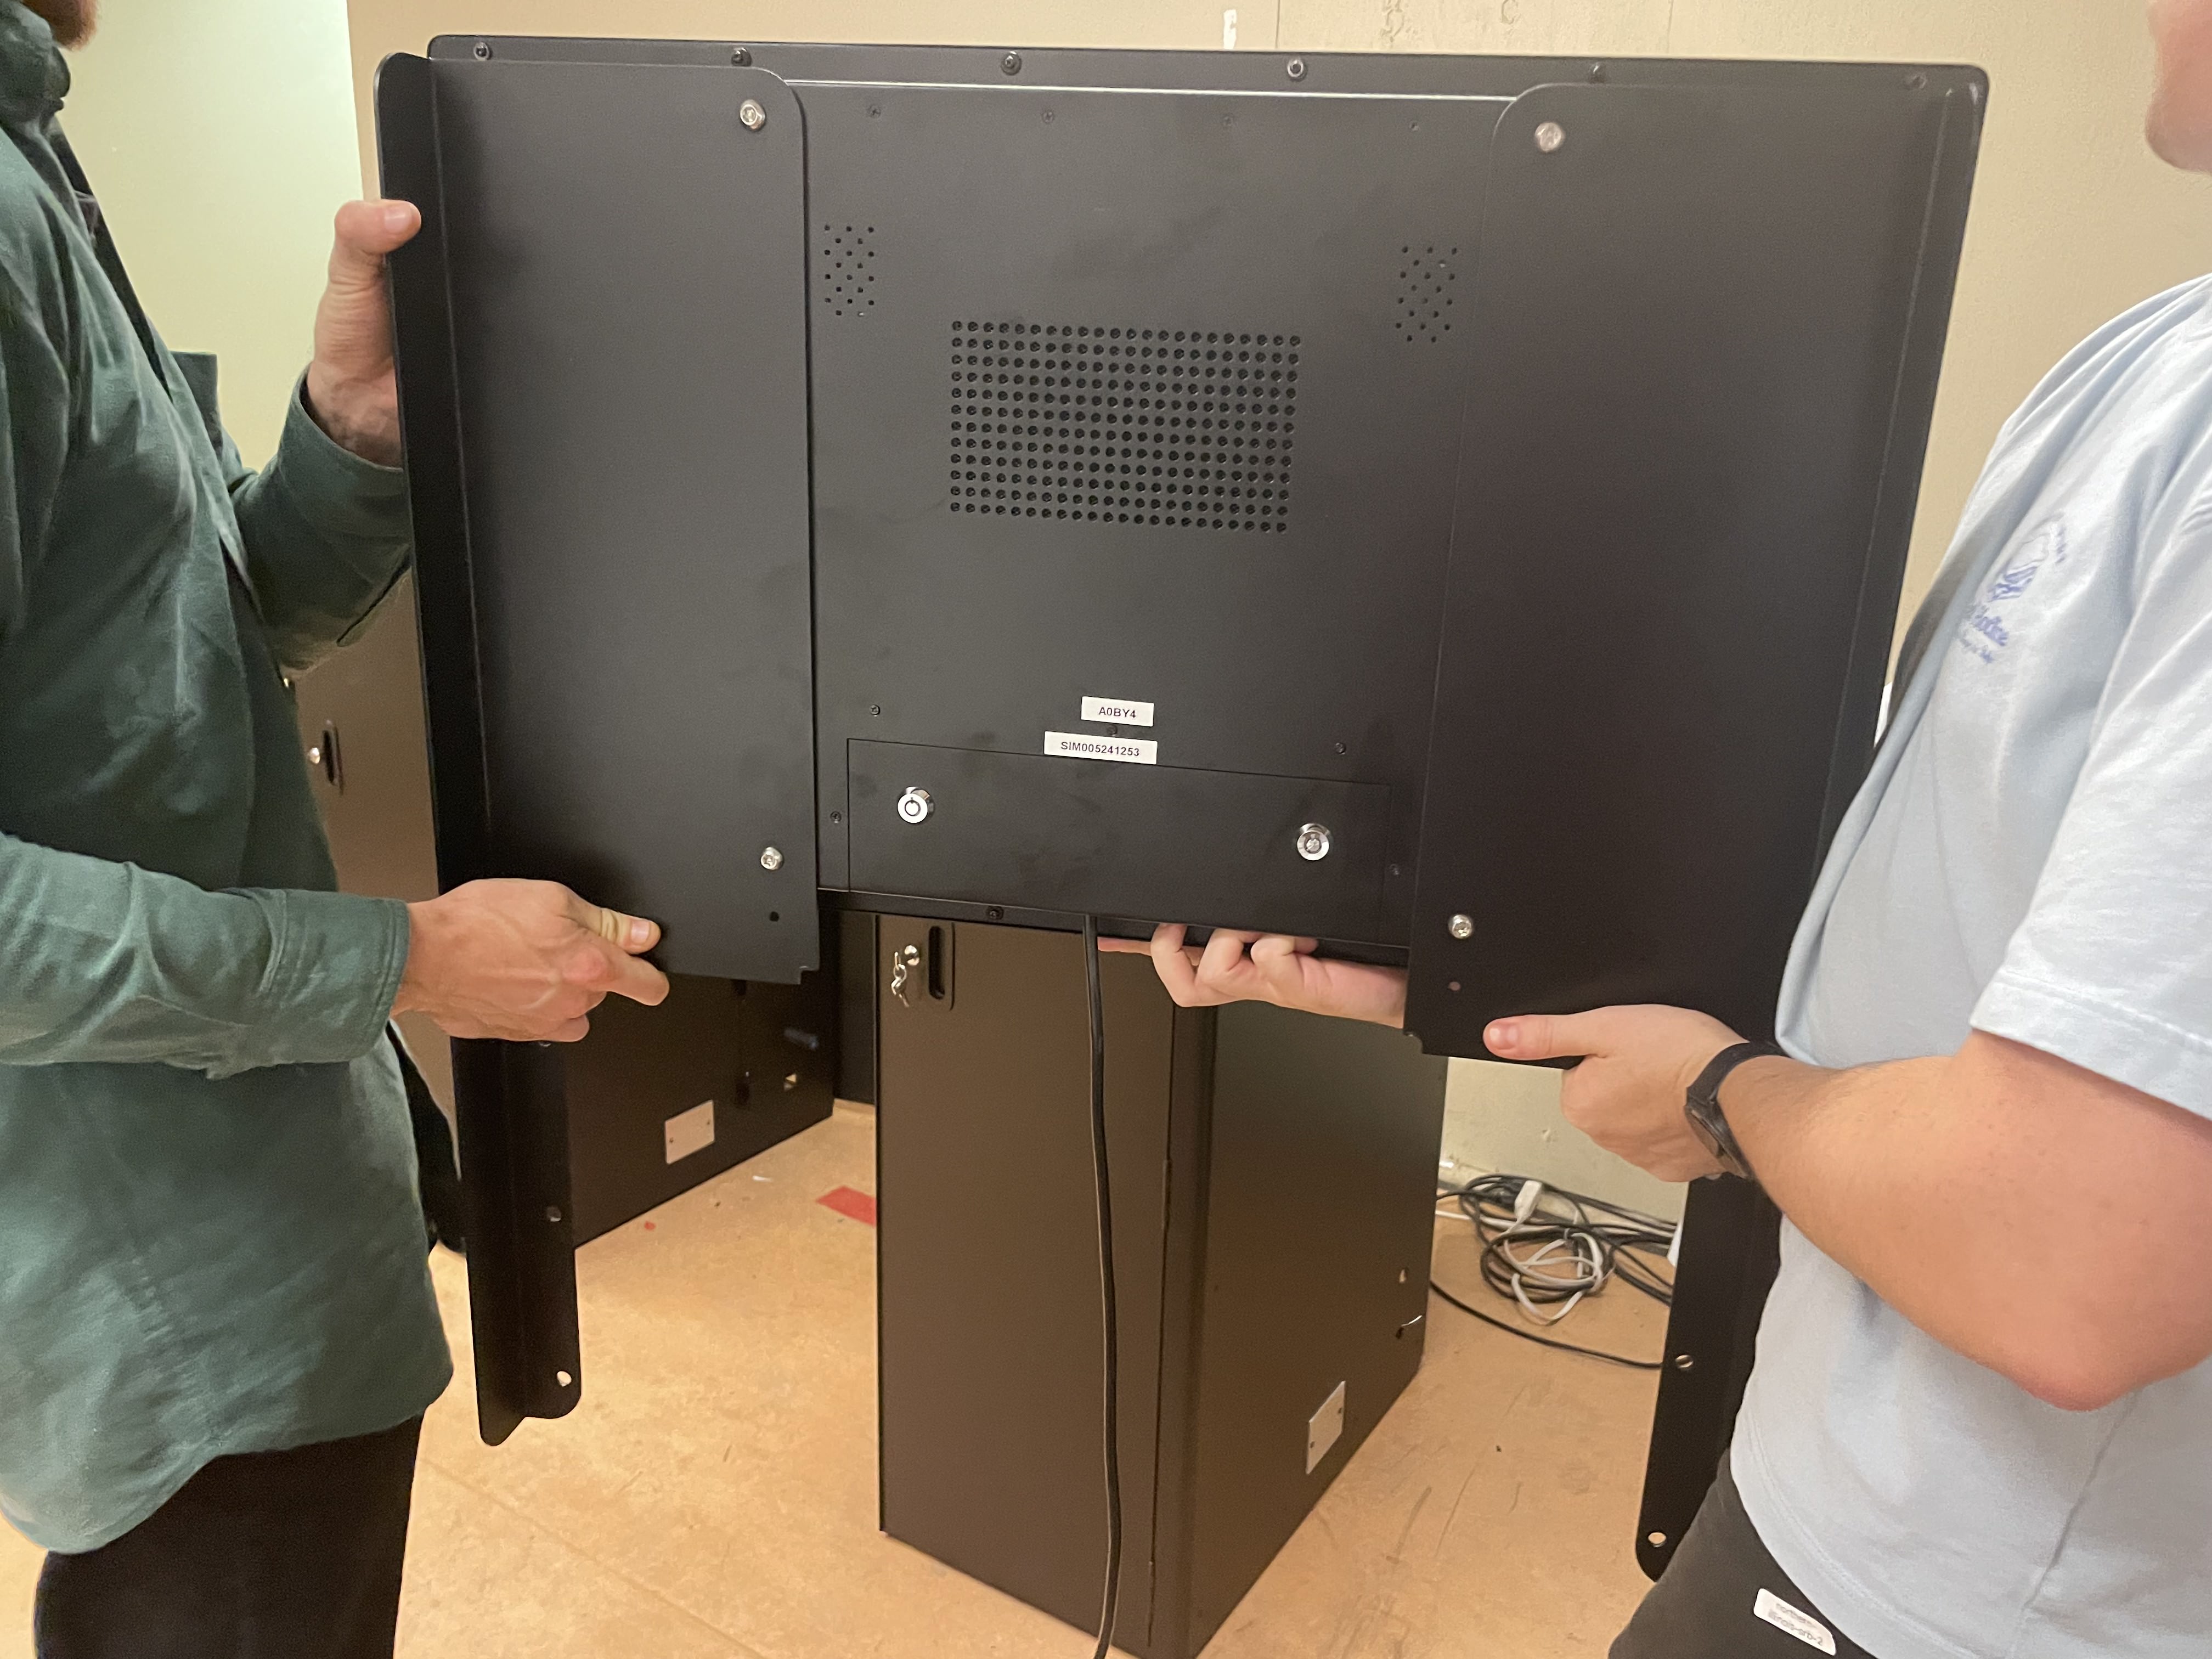


⚠️ Keep holding the TV until Step 9 is done. Step 7. Tighten the 4 supporting screws
⚠️ Be careful to prevent TV from tipping forward like so:
Step 8. Screw in the bottom 2 screws through the legs of the mounting brackets.
Step 9. Tighten the top 4 screws. Now go back and tighten the top 4 screws all the way. You can let go of the TV once this is done. Step 10. Thread the 2 mounting plates through a screw (one of the mounting plates on each set has a noticeably larger hole than the other) to the highest hole on the right and left side and secure.
⚠️ Ensure the mounting plate is in a vertical position once screwed in fully so the bin hatch can still open easily.
Step 11. Screw in remaining screws. Final product should look like this:
Step 12. Check that it’s secure. Gently push on the top corners of the TV. It shouldn’t move or lift.
Part 4: Connect and set up
Section titled “Part 4: Connect and set up”Step 13. Plug in the TV. It will power on automatically.
Step 14. Plug in mouse
Use the 2 barrel keys to unlock and remove the back hatch of the TV. Plug the mouse into the USB port inside.
 Step 15. Close the TV hatch with the mouse cord beside the power cord
Run the mouse cord out of the TV the same way the power cord comes out, so the two cords sit side by side. Put the hatch back on and lock it with the barrel keys.
Step 16. Store mouse inside the bin hatch
Open the back hatch of the bin. Feed the mouse inside and tuck it to one side, where it won’t get in the way of anything in the bin. Close the bin hatch.